Digital Audio
Symphonix Evolution can store 8 tracks of digital audio in addition to the 16 MIDI tracks. This is ideal for accompanying vocal or guitar renditions of the song.
To record a Digital Audio Track, press the
![]() button just as you would
for a MIDI track. The Record Options screen appears:
button just as you would
for a MIDI track. The Record Options screen appears:
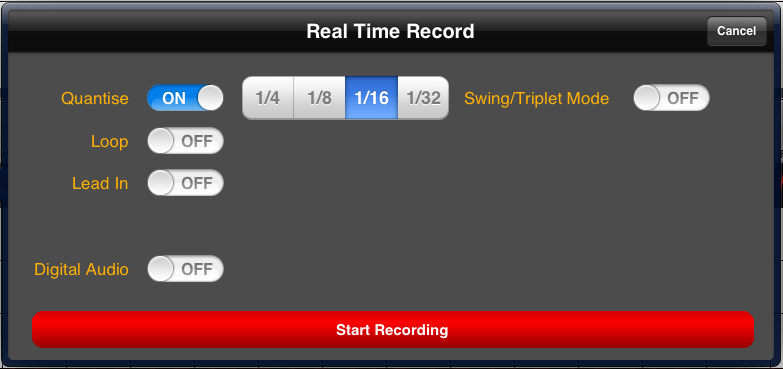
Switch the "Digital Audio" option to the ON position:
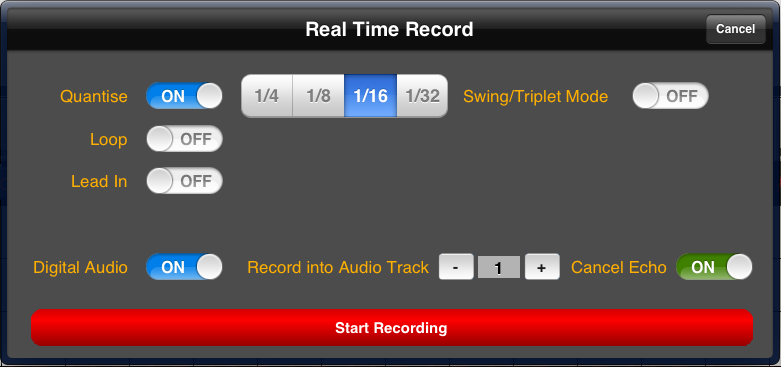
Use the "Record into Audio Track" option to select a track, from 1 to 8. When recording, please note that the original contents of the track will be completely erased even if the 'punch in/out' option is used.
Use the "Cancel Echo" option when recording from the iPad's inbuilt microphone or a connected headset if you notice that the sound from other tracks is interfering with the new track. This option should be set to the "off" position when using a connected audio interface that works through the iPad's data connector.
Press "Start Recording" to begin recording. When you are done use the Stop button to save the new recording into a digital track.
Important Note: Digital audio can only be saved in the native "Symphonix" file format - this data will be lost if the song is saved in other formats.
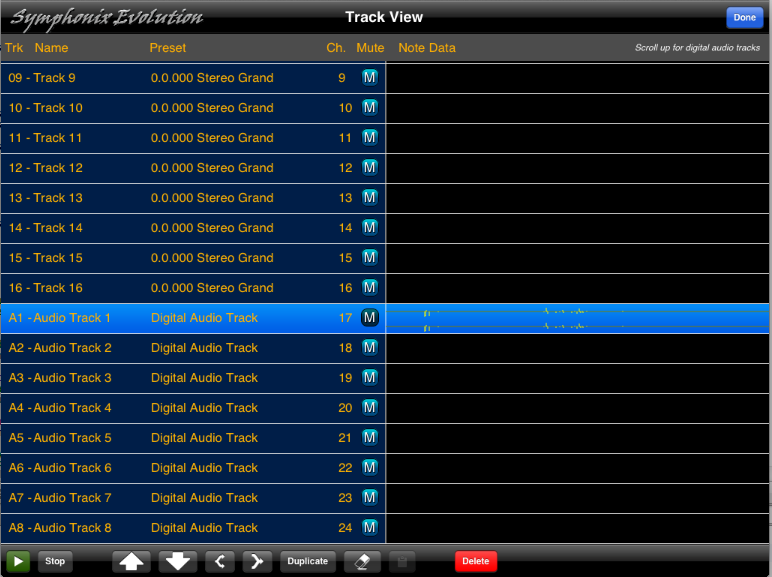
Digital Audio Tracks cannot be edited directly, but are displayed in the Track Manager screen below the first 16 MIDI tracks. Scroll the track list down until you see tracks labelled "A1" through to "A8". These are the digital audio tracks:
Digital audio from other apps can be pasted into Symphonix Evolution, provided the other app supports copying to the PasteBoard (Clipboard).
Once audio is on the PasteBoard, highlight the track in which you would like to import audio, then tap the Paste button on the Track Manager screen (This button is only active if suitable audio data exists).
Tap the "Preset" column on the Track Manager screen to access various properties for a digital audio track:
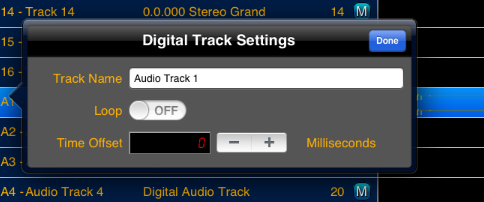
Use the loop option to set the track to play indefinitely in a loop.
The time offset can be used to alter the start time of the track, which can assist in synchronizing it with other tracks. Use a positive offset to start the track later than other tracks. Use a negative offset to move the track so it begins earlier (but note that using a negative offset will truncate the first portion of the track).