Instrument Finger Positions
Symphonix Evolution allows finger positions to be set for each note. These can be made visible during music playback to assist in learning how to play a piece of music.
Before using this feature, be sure to enable the "Show Finger Positions When Available" option in the Beginner tab of the Advanced Settings screen
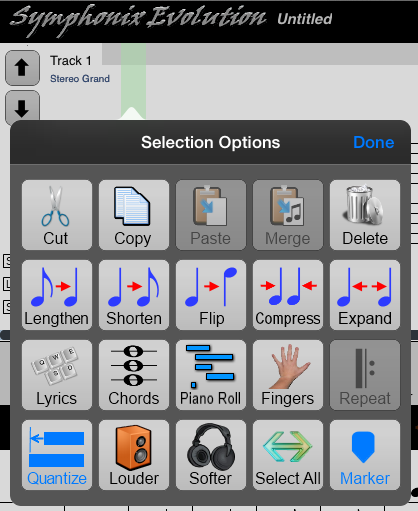
Begin by selecting the point in the song where finger positions are to be added. Do this by using the Select function to highlight a note column in green, and then touch inside the green highlight to display the selection menu:
Touch the "Fingers" button to enter finger position edit mode. In this mode, a "Finger Entry" panel is displayed, and the current position is highlighted in orange. The current note being edited is drawn in red.
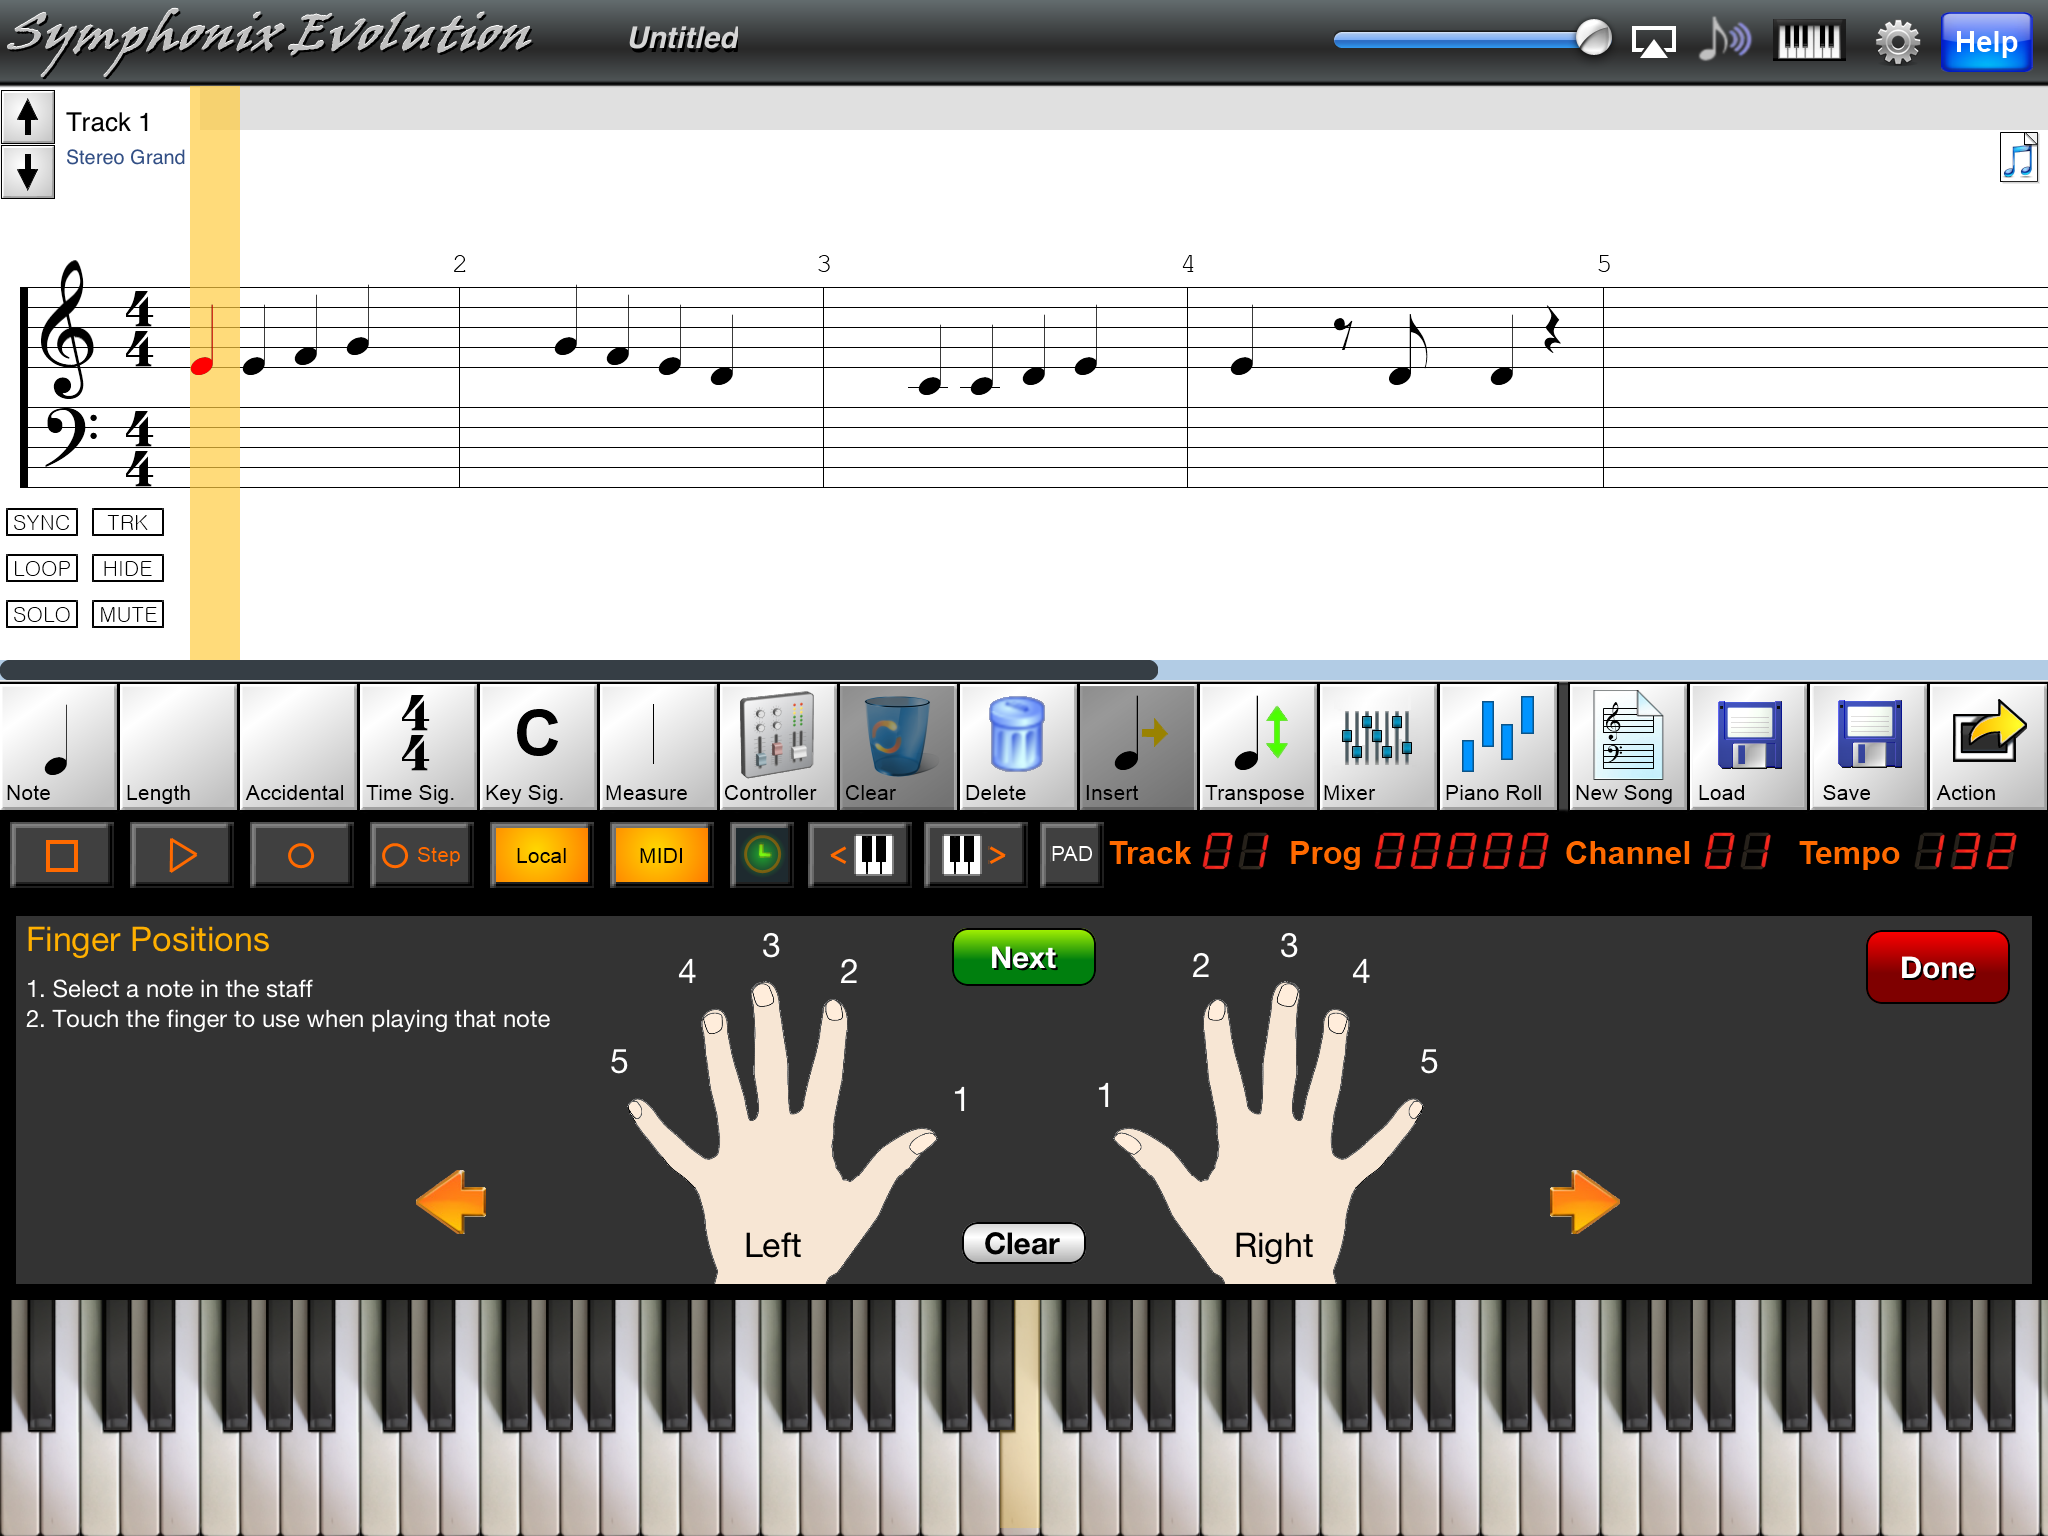
As a further aid to learning, in this mode the virtual piano keyboard highlights all of the keys corresponding to the notes in the current position of the score. This can assist with learning how to play a piece of music - use the orange arrow buttons to move to the next or previous note "column" in the song to quickly see where notes are played on the keyboard.
To enter a finger position against a note, first select it so it is highlighted in red and then touch the appropriate finger in the "Finger Positions" panel. A red indicator is drawn on the finger, and a number representing the finger is displayed on the Piano Keyboard below the "Finger Positions" panel.
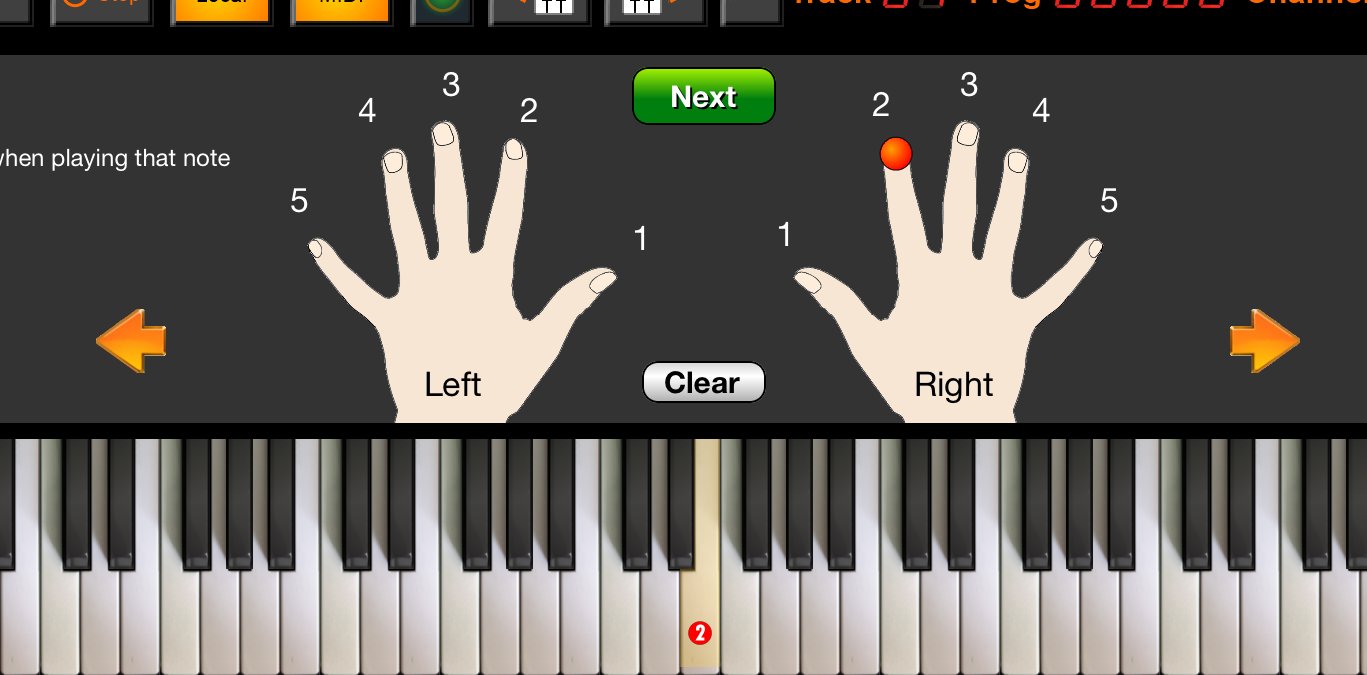
Continue to select additional notes and record the finger positions, and press the Done button in the top right corner of the "Finger Positions" panel when all notes have been entered.
The other buttons on the "Finger Positions" window are designed to make it easier when entering positions for an entire song:
Use the green "Next" button to move to the next note in the song
Use the orange Left and Right arrows to move to the previous or next note column
Use the "Clear" button to remove a previously entered finger position from the current note