Piano Roll
Use the Piano Roll ![]() button to change the display from music notation to a sequencer view:
button to change the display from music notation to a sequencer view:
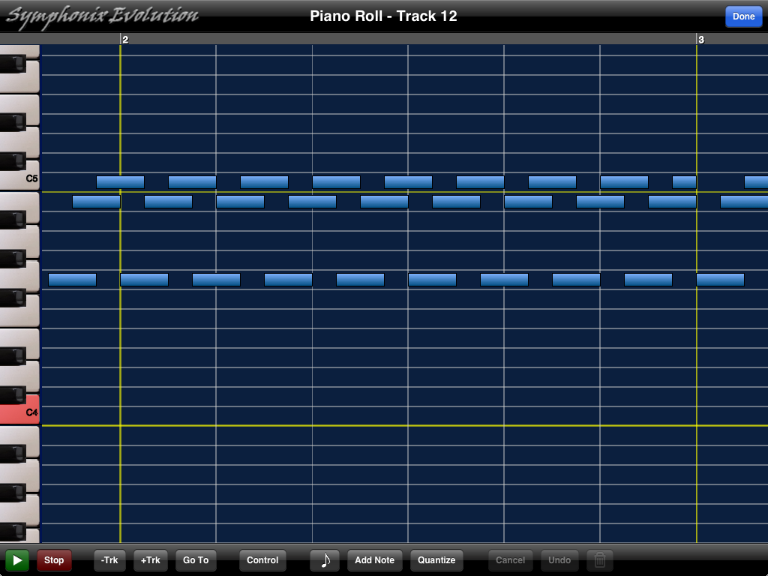
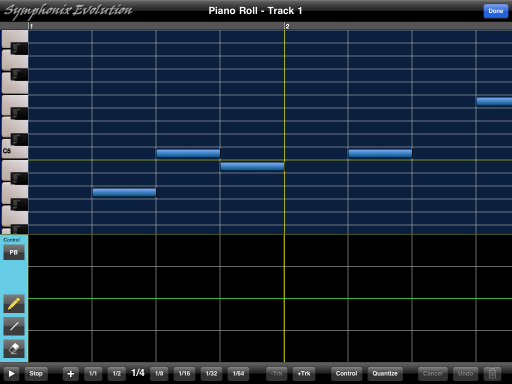
In Piano Roll mode notes are displayed graphically. The vertical axis is used to display the pitch of the note and the horizontal axis shows the duration.
It is possible to use Piano Roll mode to add notes to the song, and Symphonix Evolution will automatically convert these back to music notation when the "Done" button is pressed.
To add a note to the Score:
If you touch the ![]() button and decide not to add a note after all, use the Cancel button to abort
the Add.
button and decide not to add a note after all, use the Cancel button to abort
the Add.
To delete a note from the song:
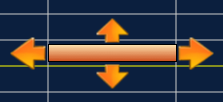
Use the touch screen to edit the note directly, as follows:
The Piano Roll screen includes a Quantize function to automatically adjust note timings. This option is especially useful after dragging or resizing notes, or to fine-tune a sequence that was originally recorded from a MIDI device without applying Quantization. (It is especially useful because it works on the current Track only, allowing other tracks to remain untouched).
Use the Undo button to reverse any changes you have made.
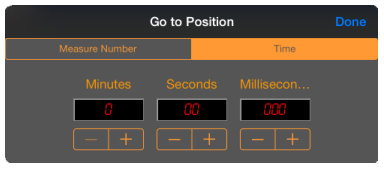
The ![]() button can be
used to go directly to a time or measure number in the song:
button can be
used to go directly to a time or measure number in the song:

Locating a Note in the Piano Roll
From the main Notation screen, it is possible to quickly locate a position in the Piano Roll:
1. Select the column to be located
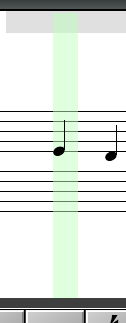
2. Touch inside the column to display the Selection menu:
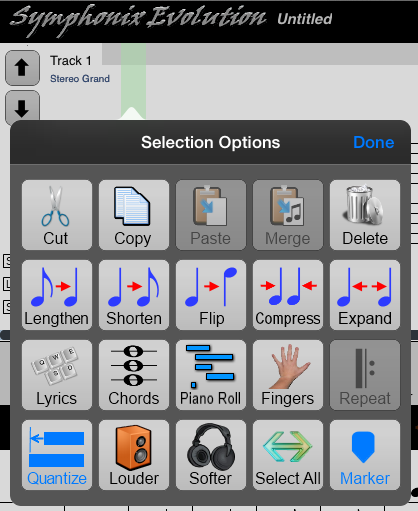
3. Choose the "Piano Roll" option to locate the selected column inside the Piano Roll screen.
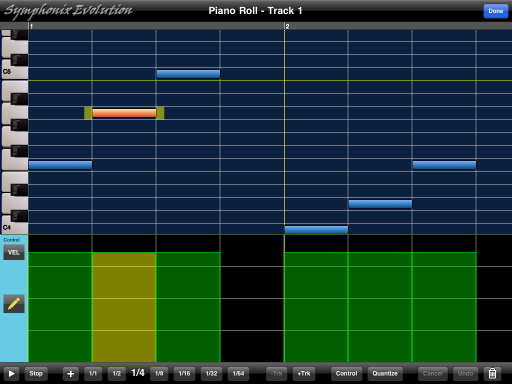
Editing MIDI Controller Events
Use the Control button
![]() on the Piano Roll
screen to open the MIDI controller editor. The bottom part of the Piano
Roll window will show control events using the same timing as the note sequence
in the top part of the screen:
on the Piano Roll
screen to open the MIDI controller editor. The bottom part of the Piano
Roll window will show control events using the same timing as the note sequence
in the top part of the screen:
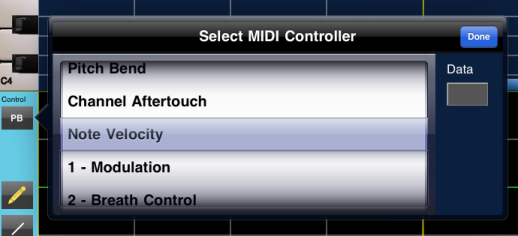
The Control button on the left side of the screen can be used to select the Controller that is currently being edited:
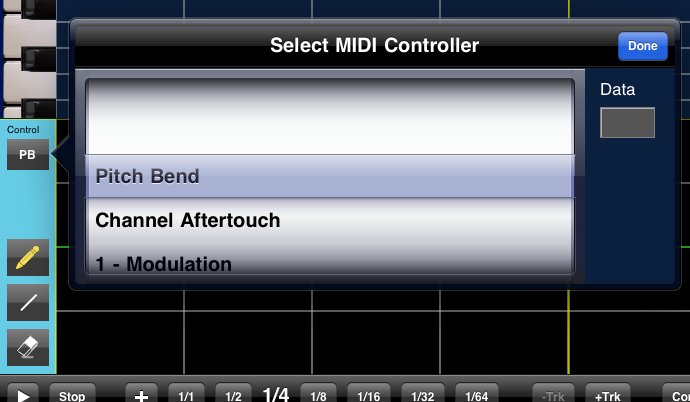
Some controllers, such as RPN and NRPN, may also require an additional parameter. The "Data" field on the right side of the selection window will be enabled if this is the case (for example, RPN will require the parameter number to be specified).
The remaining buttons on the left side of the Controller Editor determine the Edit Mode that is used when touching the main Controller screen:
|
|
"Draw" mode. Touch the Controller panel to draw controller
values directly on the screen. This is most useful for Pitch Bend
or Modulation control.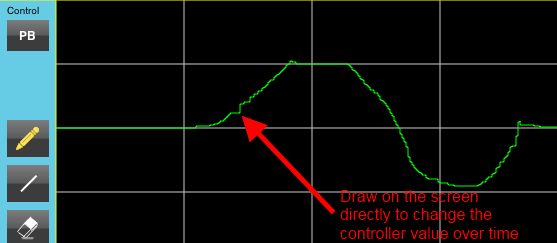 |
|
|
"Line" mode. Touch the Controller panel and then drag a
"rubber band" line. This is most useful for linear sweeps or pans
over time, or adjusting volume fade ins or fade outs: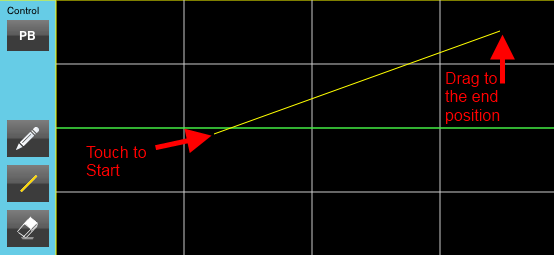 |
|
|
"Erase" mode. Touch the Controller panel and then drag to
select a section. Release and the highlighted section will revert
to the default value for the specified Controller: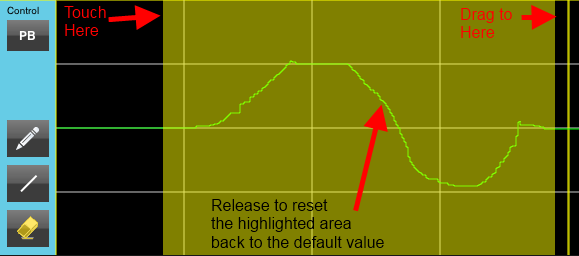 |
Important: Changes made to the Controller Editor are saved to the main score immediately (allowing the Play button on the Piano Roll screen to be used to review your changes). It is not currently possible to undo individual changes made with the editor so it is recommended that the song be Saved first before making extensive changes.
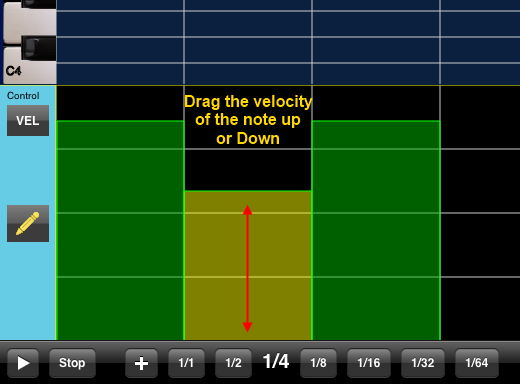
The Controller Editor has a special mode for editing note velocity, which works slightly differently to the other MIDI controls.
First, choose "Note Velocity" from the list of controllers:
The screen will now display the note velocities. Notice how the "Line" and "Erase" editing tools are now hidden:
Select a note in the top part of the screen. The note will also be selected in the Controller Editor. Now touch inside the selected note in the Controller Editor and drag the velocity up or down to change it:
The Note Velocity is similar to the other controllers in that changes take effect immediately, so that the "Play" button can be used to hear the effect of your changes. This means that it is possible to close the Piano Roll screen without re-notating. This is important if you want to keep the music score (accidentals, etc) exactly as it was before making the changes!